Showing posts with label DIY. Show all posts

Thursday, March 28, 2013

Herb Spotlight: Calendula

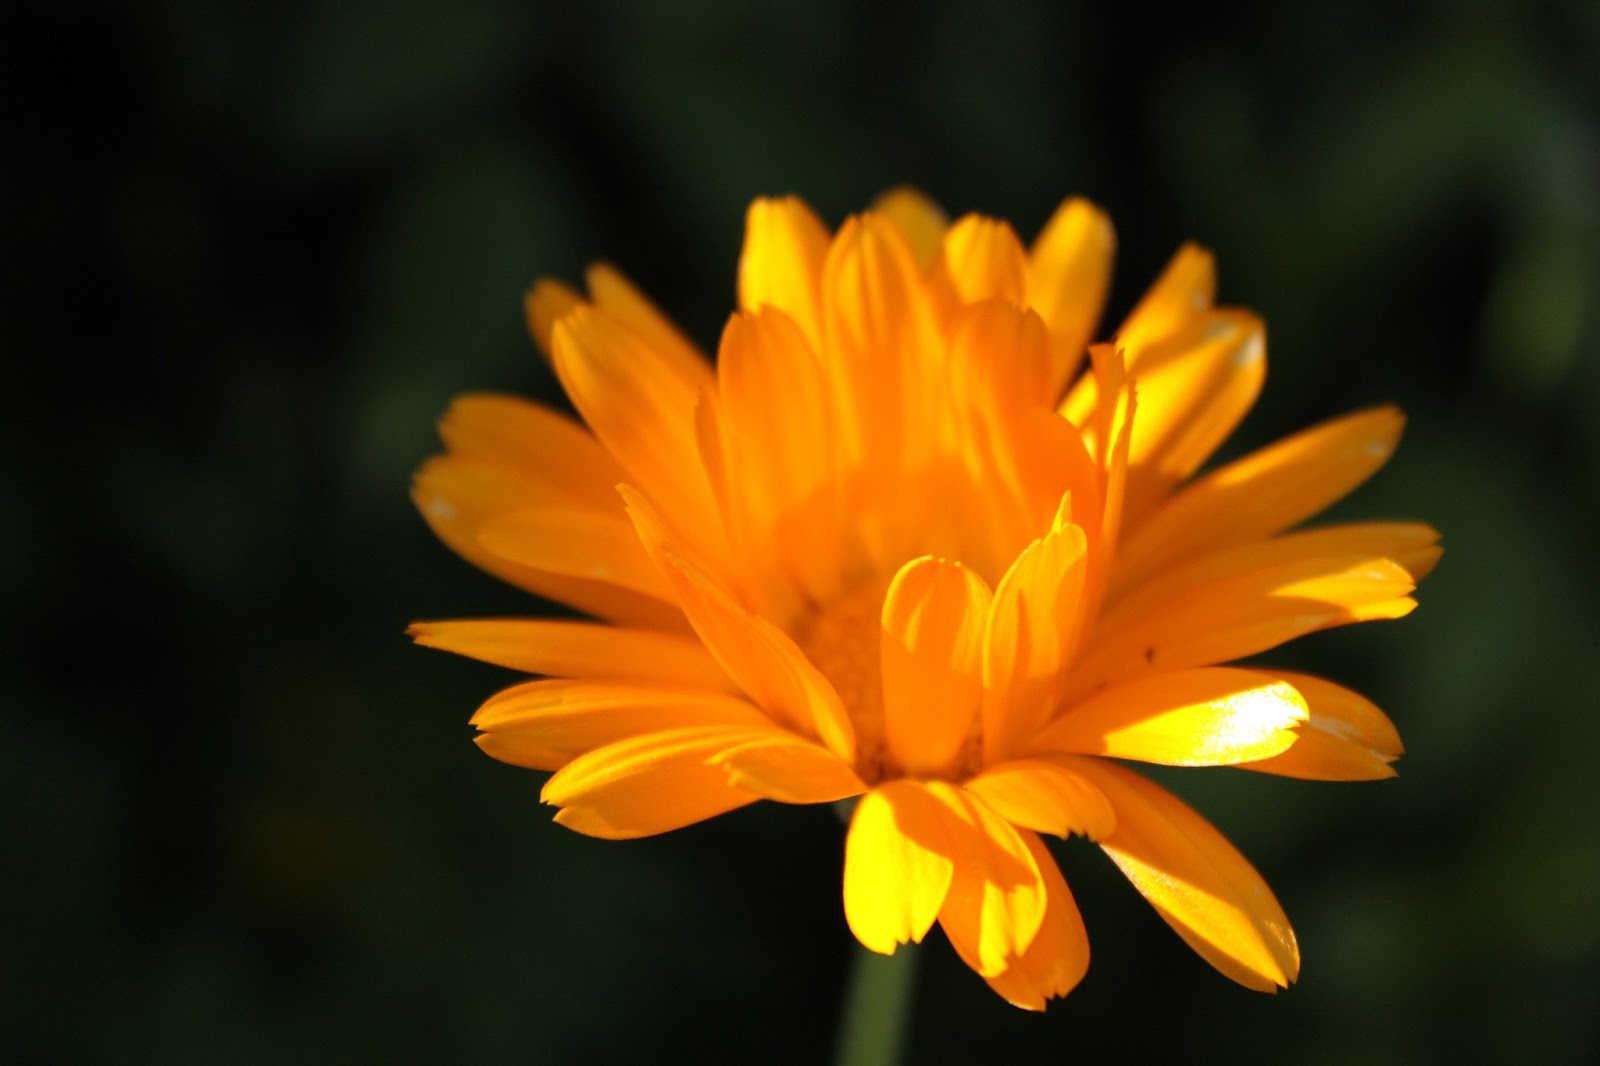
Calendula-Calendula officinalis

Calendula is a wonderful little herb. While commonly called pot marigold, it's not related to marigolds. Botanically speaking, it's a member of the Asteraceae family meaning it's more like a daisy than a marigold.

Because of that, if you're allergic to pollens of flowers from that family (namely ragweed), it's better to avoid it since it can cause a similar allergic reaction. The NIH also recommends that it not be taken if you're also taking certain sedatives. A tea made with calendula should not be consumed during pregnancy. As always, please make sure to take medicinal herbs with caution and knowledge!

However, it's still a safe herb to use and is often used by herbalist. The flowers are eatable (although some find it bitter), can be made into a tea, and used topically. It's typically used to treat  sore throat and mouth, menstrual cramps, and ulcers. Calendula has anti-inflamatory properties so it can be used to help clear up acne and rashes (provided the user isn't allergic!). It's also used to help with pain, swelling and to heal wounds. Neat!
Here's a handy, dandy how-to on making your own calendula oil which you can use straight or in making a cream or salve (depending on how you like to use it).

What you'll need:


  1. Clean jar with a lid  (I use a mason jar because I can and always have them on hand) 
  1. Dried calendula petals* (grow your own or order them from a green friendly place like Rose Mountain Herbs)
  1. Oil (You can use almost any oil but I recommend a skin friendly oil like jojoba, grapeseed, olive or coconut. I like a half and half blend of olive and coconut)


Make your oil:

There are two methods you can use; cold infusion or hot infusion. I'll explain both

Cold infusion:
This is the easiest method and you can do this with a lot of different herbs, not just calendula. It's also a preferred method because herbs can be delicate and heating can destroy some of that herby goodness.


  1. Fill your clean jar with your dried herbs (about half way full...so you'll want to decided what size jar you're going to use when you buy/harvest your herbs). 
  1. Top with your oil. Fill the jar up as far as you can without spillage (otherwise you can end up with your very own slip and slide kitchen floor.)
  1. Put a lid on it!     
  1. Once your jar is closed up tight, you'll want to keep it in a warm sunny place for 3-4 week. Shake it every once in a while and watch the beautiful golden color develop (if you're using calendula)
  1. After a month or so, you'll want to strain your herbs out of your oil. You can use a tea strainer, muslin, cheese cloth or my favorite, a jelly bag ( I like the jelly bag because I can let it drain out with very little effort or monitoring on my part.)

That's it! You are done, my friend, and you can keep your oil in a sealed container for up to a year (a dark place is better than in full light) or use it in other products you want to make.

Heat infusion:
I use this method because I work with coconut oil a lot and it tends to solidify if it dips below 80 or so (which is also why I blend it with olive oil to create a slightly more liquid oil). You can also use this method if you don't want to wait a month to enjoy your oil.

What you'll need:
In addition to the supplies above, you'll need something to heat your oil in like a crock-pot, a sauce pan or a double boiler. I use a double boiler because I'm lazy and there isn't as much risk of burning your oil this way.


  1. Take your herbs and oil and add them to your choice of vessel (crock-pot, sauce pan, etc...)
  1. Heat these herbs and oil on low for 2- 4 hours. Yep, two to four hours. If you can stand to do it longer, go for it but remember, you have to stir frequently because you just want the oil to heat, not cook.
  1. After you've finished heating this mixture, let it cool. If you're using an oil that solidifies (like coconut), don't let it cool to the point that it hardens so you might have to strain it while it's still pretty warm. Other wise, let the mixture cool and stain out the herbs in the same method as cold infusion.
  1. This oil store the same way you would the cold infused oil.

And there you have it! A lovely oil made with your calendula.
Here's some baby calendula from my herb garden last year!


*Use dried herbs because fresh herbs contain moisture, meaning water, and water in an oil infusion can lead to the oil turning rancid. Aside from losing all your hard work, you could have a stinky mess on your hand or botulism.  People do use fresh herbs from time to time and are just fine but why risk it?

Thursday, January 10, 2013

Plant of the day: Succulents

In my 2012 garden, I fell in love with succulents and I'm really not sure why I hadn't just been putting them absolutely everywhere prior to that point. Succulents are awesome because they play up to some of my best strengths, namely abandonment and forgetting to water things.

From July, you can see some of the plants are getting big!
Now, I know that these two skills might make me a terrible gardener but somehow my garden always makes it. In fact this year, it got so large I started calling it Jurassic Park. I had tomatoes that would have been taller than me if they hadn't been weighed down by their fruit and 12 ft tall sunflowers (they drove the squirrels crazy!). Once the plants started producing--and you'd be surprised how many tomatoes 23 plants produce...or not--I was a lax photographer so unfortunately, I don't have the pictures where there was plants everywhere!


But back to my succulents. They're great because they're very low maintenance. They like the hot and they like the dry. Plus (and this may not be a plus for everyone) they don't get out of control big. I like to use them in containers because I can then move them around the yard.

Succulents fall into a fairly broad category of plants and even definitions. If you're a botany nerd, such as I am, you'll know that there are a lot of different orders and families that fall into the common term of succulents. Now, I'm not wild about cacti so the succulents I usually plant fall into the family Crassulaceae.  That's mostly because I have a habit of groping plants. Yes, I commit plant frottage.

What this means (the plant family, not my need to touch them) is that I like to plant succulents like Hen and Chicks or Jade. So those are some succulents that are easy to come by and if you plant them in containers, you can bring them inside during the summer so you can enjoy them year round!


Sunday, January 6, 2013

Back in the sadle: How I spent my summer

I meant to document this through out the summer last year. Of course when you're doing demo work and putting in 320 sq ft of garden beds, time can get away from you. However, it's the winter now and while I'm waiting for the seeds to sprout and the ground to thaw, I can start updating my blog again. So here's how my amazing garden came to be!

Part of the backyard makeover involved taking out a deck and a sidewalk. The old deck was a bi-level deck that was composed of two 18X18 sections. It was fairly unsafe because (as we found out when we were taking it apart) the beams were a little too far apart and the top section lacked hand-railing. I'm sure back in the day, the deck was a big selling point... like if you're a big bbq-er or I don't know, whatever else people do on decks. The deck and the backyard were not the reason we were drawn to the house. Under our care, the deck mostly became a halfway house for foxes and raccoons. Which is clearly what the suburbs needed.

Well we ended up taking out the whole deck (which is where I found out I really like tearing things apart) and I smashed out the side walk. That looked like this.

Seriously, I love smashing concrete
This is what the new deck looks like. We played with some of the porportions and unfortunately this picture is not an in progress one and you can see that we started paving already.
The deck still isn't stained and it's sort of a work surface but it's still a neat deck
We used two different patterns to give ourselves some additional options for parties. The pavers that were put down in a traditional grid form the garden path and the diagonal pavers form a little patio where we have a chimina
As for the pavers, well we took out all of the grass on one side of the backyard and reclaimed the area from the old deck. This is 500 of the 1000 pavers that we purchase to put down between the raised garden beds. We put the beds in first so that we could lay out the pavers correctly. Those boxes by the way are made out of the old deck! It wasn't treated lumber so all we did was sand off any remaining stain and built these amazing raised beds.

Tuesday, May 22, 2012

Plant of the day-Gomphrena globosa

Globe Amaranth/Bachelor Button
Gomphrena globosa

Globe Amaranth is a fun little flower that can add a bright pop of color to your planters. It's a mounding annual, attracts butterflies and is very hardy.

They need full sun and are drought tolerant (although they're a fan of regular watering)

These are a long blooming flower so if you put them in during the spring, you can enjoy them all the way until fall. As a bonus, you can dry these flowers and they'll look basically the same as they do while they're blooming. I have a purple specimen featured here but you cal also get red, white, lilac and pink flowers.

Fun facts
  • On Brother's Day, in Nepal, sisters may use the flowers for a garland for their brothers which represents protection.  
  • The seeds are used as a food source in some parts of South America and can be used to make flour and beers.
  • The flowers have been used to make a tea thought to treat gripe, coughs and diabetes.


Monday, May 21, 2012

When life gives you lemons, landscape!

Last year, one of the winter storms here took out part of the old cherry tree in the front yard. It was one of those early season snows that came before all the leaves had fallen off. A number of branches broke and by the time we pruned back the unhealthy parts, the tree looked pretty bad so we took down the last sad little branch and were left with a stump.
This was the cherry tree, last year.

I decided to throw some pots on the stumps because why not. This was a remarkably easy DIY planter. All you do is find some planters (I recommend terra cotta or another porous/semi-porous material because you'll want really good drainage up here. I attached 4 glazed terra cotta pots because they were pretty and at Tuesday Morning, the most expensive pot was 10 dollars. Make sure they have a drainage hole in the bottom or you'll have to drill one yourself.)

Then, all you need is some bigish screws and washers. Make sure the washer is larger than the drainage hole, this is what will help keep your pot in place if you have particularly slanty angles like I did. You can drill a starter hole in the stump first (if you want to make it a little easier on your drill) then situate your pot, put the washer on the screw and put the whole shebang through the drainage hole on the pot. Tighten so the pots are secure but not so tight that the pots crack. Then you're ready to go!

Ta-da! Now you have an interesting, eye catching fixture in your garden and you didn't have to go stumpin'!

I'm sure this isn't for everyone but I absolutely love the way this looks and how easy it is to transform the planters. Above I have it filled with daffodils that had started to spring up all over my garden. Since then, I took the daffodils out (saved the bulbs of course!) and put some annuals in the pots.

This is what it looks like now


Sunday, May 20, 2012

Adventures of Garden Girl

Didn't I tell you I suck at blogging? I used to be better at it. That was before life hit me with a litany of to dos that I don't usually want to do. Like laundry or having a job where wearing my sheep jammies are looked down upon. Not that I don't like my job or having a job, I just like working at home because everyone there says my jams are awesome.

What I have been up to however is gardening. I've always liked it but more as a passerby. A few tomatoes in the backyard, some planters on the poach. This year however, I went balls to the wall. Go big or go home. Since I'm already at home I'm not sure where I'd go. Maybe inside to take a nap.

Anyway, I started a lot of seedlings and build a ton of raised bed gardens (full disclosure, I supervised the building because I probably would have just started them on fire if left to my own devices) and have been planting like crazy since the danger of frost has passed.

I've also gotten involved in the transition gardening movement. I'm not worried that the world will end or anything like that (I'd be drinking a lot more if this were the end of days, not planting corn) but I do like the idea of eating things I've grown. Like a mother hamster. And I like the idea of harvesting and processing my own herbs and what not. Or just growing them. I'm not really sure how far I'll go with all this. It's possible I'll just be a helpful resource to others because I do know a great deal about herbs and what they can do so yay.

I'll be documenting all the things in my garden so here's a preview of the flower part: